Tuesday, February 12, 2013

Writing Persuasive Essays

The students have been working on persuasive essays these past couple of weeks. We have been studying the planets and author's purpose so they are writing pieces trying to persuade an alien to come move to their imaginary planet!

This is the flow map I introduced them to, to help guide them through their writing.


Here is an example of a student's introduction.


They brainstormed things their planet had using a circle map.


Then they organized their writing and wrote out the sequence using a flow map.


After they planned out their writing with thinking maps, they began writing their rough draft. They wrote in a different color for each section. This way, they could see if one paragraph was a lot longer than the others and see how the different parts created one entire piece.


Critical Thinking and Problem Solving

It's very important that kids learn how to problem solve. It's difficult as a teacher to "teach" how to be a problem solver. I've learned that the best way is to give the students fun mystery situations and have them figure out things on their own. We do a lot of logic activities that require the students to synergize to figure out the answers to their mysteries based on the clues they are given.


Synergizing! The students each had clues after a mystery was read to them. They had to figure out where items were hidden based on clues.


They learned how if one things is true, then they needed to cross out the other items or locations. Great problem solving!


Here is what the matrix looked like!

Perimeter and Area

We have been studying perimeter and area these past two weeks. The kids are doing an amzing job! We did activities that challenged the students and had them thinking "outside" the box. Hee hee!

I gave the students a given perimeter and they had to construct a figure on the tiles. This had them thinking at a higher level. It's easy for a student to calculate the perimeter by counting the square units on each side of a figure or adding each side up when a figure is given to them. When the perimeter is given to them and they have to construct the figure, it has them really applying what they've learned at a higher level. This activity was really fun! We talked about how each tile was a square foot, so it made it easy to determine the perimeter in feet. We used dry erase markers, thinking it would easily come off of the floor...well, it didn't. Whoops! But we sure did have a lot of fun. :)

This was my example.

The girls working diligently on their figure. s


They did a great job!


Some of the students tried to make equilateral figures, but it didn't work out so they came up with a trapezoid!

It was easy to differentiate for each group, the GT kids were given a higher perimeter which challenged them a little more.

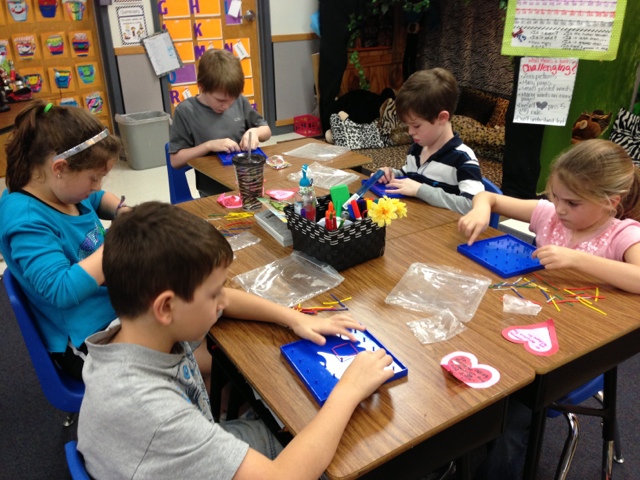
When we finished in the hallway, I gave them a given perimeter and then they constructed figures on a geoboard.

They came up with some very interesting shapes!

The students then split up in partners and took turns coming up with a perimeter and constructing the figures. They did a great job!


Our next activity was an activity I got here. It's a perimeter activity where the students measure the perimeter of a slice of bread, which is the crust! It's an activity that leads the students into how perimeter relates to real life applications.


We finished up perimeter (which we will come back to later) and began area. The students learned about area in 2nd grade so in 3rd grade, we are just building on that foundation they have and adding a little more. We watched a brain pop on area and began a SmartBoard activity.


The students on the carpet were figuring out the perimeter and area while the student on the SmartBoard was too!


After the SmartBoard activity, we used the same concept as our dry erase figures on the tiles, but we were smarter this time! We used string and ribbon that was so much easier! The students were given an area this time and had to construct a figure that had a specific area. We talked about how to count the halves, and the students were excited for a challenge! Luckily, we had an amazing Watch Dog Dad in our class to help!


The Watch Dog Dad helping with the figures. This group had an area of 20 1/2 square units. They did an amazing job coming up with a shape.


We talked about how not to come up with the normal shapes and to think "outside of the box". We didn't want to see regular rectangles or squares. :)


Out of this world - Space!


Wednesday, February 6, 2013

Measurement

We have been talking about measurement these past couple of weeks. The students measured the temperature of cold, room temperature, and hot water with thermometers. We discussed the different tools they were using, graduated cylinder, thermometers, and beakers. The students had to measure exactly 100mL of water. They learned how to look at the meniscus and determine an accurate measurement. The students measured the temperature in degrees celcius. They had a great time!

Looking at the meniscus to make sure they get an accurate measurement.


Reading the thermometer to determine the temperature of the water.


This is the recording sheet they used.

Author's Purpose

The past couple of weeks we have been studying about Author's Purpose. We made this cute foldable to introduce Author's Purpose. We read several books and discussed if the author was trying to persuade us, inform us, or entertain us. We then cut out little pictures of the book cover and glued them in our foldable.


The next day, the students brainstormed with a partner products they would sell and decided on one to advertise. They had to create an advertisement that would persuade someone to buy their product. We discussed boring advertisements and exciting ones, what an advertisement should include, and who their audience would be so they knew how to market their product.